Simple Saturday: Labels of Love

What? Me? Read?The Simple Saturday Labels of Love reading game is so easy a dog can do it! For real. Let me show you.

Did you do what I asked you to yesterday? Did you take note of your wee one's objects of desire? Things that are the most important to them? We're going to use their love for these things to spark a love of the written word.

Have you gathered up the supplies? The index cards and markers? You haven't? Well, hurry up and get them. Tripod and I will wait for you.

Lick. Lick. Slobber. Slobber. Hug. Hug. Oh! You're back! Good...

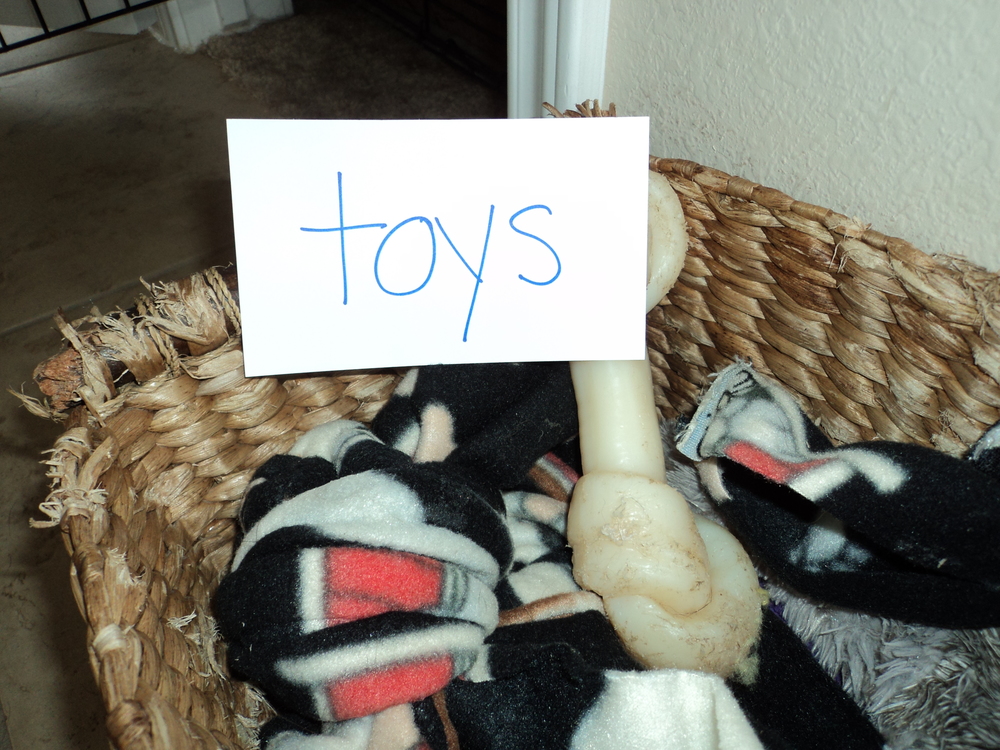
 Now all you have to do is write the names of the objects of desire on the cards. Make a few labels. How many? Oh, about ten or so would be good. Show your child how the word is spelled. Talk about the beginning letters, the ending sounds...you know the drill. Help your child become familiar with the identification of the words. Then, mix up the cards and ask your little darling to read the cards and then find those items in the house. Reading is that easy! 

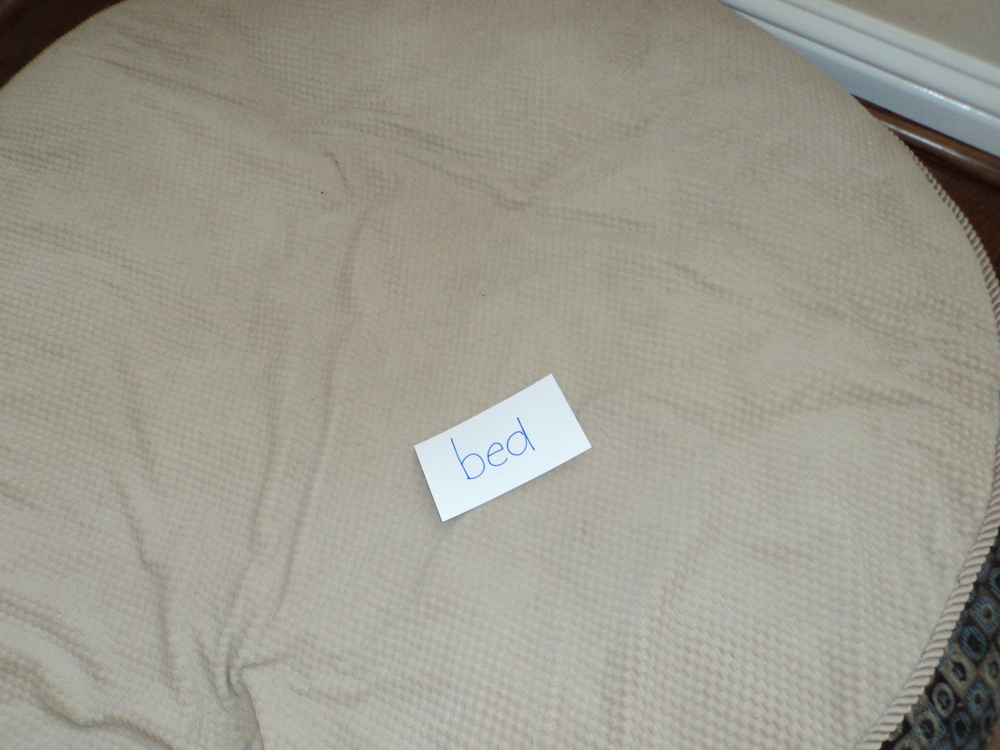
 Tripod actually did a pretty good job with this game, too. He found his toys, where his food is stored, his water bowl, and his bed. Good boy, right?

Well, I guess since he matched the label for his leash we'd better use it. See ya! We're off for a lovely Simple Saturday walk. Wish you could join us!

Simple Saturday Prep: Labels of Love

 In efforts to enhance letter/word recognition, tomorrow we're going to capitalize on your newbie reader's objects of passion. We're going to use the stuff they love to our/their academic benefit.

Food. Clothes. Games. People. Pets. Anything's fair game!

The supplies we'll need for tomorrow's Simple Saturday fun are index cards and a marker. That's it.

So, for now, observe your little darlings, closely. Notice what their objects of desire are. Keep those thoughts in mind. Check back in with me in the morning when we'll have some Simple Saturday Labels of Love fun together, okay?

I do love these sneaky posts, don't you?

Simple Saturday: Keys to Reading

Today we're going to make a Simple Saturday Keys to Reading puzzle with a collection of old keys, a small piece of cardstock, and a fine-tipped marker. That's all we need. Let's get with it!

On the piece of cardstock, lay out your keys in a pattern that pleases you. Maybe gradate them from large to small.  Or in a random splash-like design. Anything that meets your fancy. Shoot, while you're at it, make a variety of pattern cards. Let the good times roll!

Next, trace around the keys with the fine-tipped marker. Bingo, baby! You've made a puzzle!!! Good for you! Now sit back and marvel as your wee ones as they decifer between the various keys' bendy and straight lines, discovering which key goes where

Not only does this super simple activity help to develop eye-hand coordination and help to lengthen the concentration span, it offers the early reader the opportunity to discriminate between the ups and downs of line shapes. Pair this up with sight/sound discrimination and you've got a reader, pal.

Simple Saturday Prep: Keys to Reading

 Okay, my Simple Saturday buddies, tomorrow's post features another one of those activities that are so simple and yet so profound that I am almost ashamed to launch it.

Almost.

Got any kiddos that are working to learn the shapes of letters? That in grasping the awareness that specific bends and straights of simple line drawings is actually key to learning something completely life altering - the ability to READ!!!! Can you give me  hearty hip, hip, hooray for reading? Hip. Hip. HOORAY!

Tomorrow bring a fistful of old keys, a piece of cardstock, a fine-tipped marker, and maybe some scissors with you and we'll make a game guaranteed to mesmerize any child working to unlock the mysteries of  the sight/sound connection  of the written word.

Uh, oh. I feel another cheer coming over me. Please indulge me, won't you? Hip. Hip. HOORAY!!!

Simple Saturday: Bunny Eyes

Good morning, Sunshine!

Don't you love these darling Simple Saturday Bunny Eyes? Really, don't you just love the precious model wearing them? I do. Meet my grand daughter, Piper.

 For your Simple Saturday passtime pleasure, gather up your scissors, markers, that bit of yarn, and down load a .pdf template HERE. Then simply cut and color. Lastly poke a couple of tiny holes at the sides of the Bunny Eye frame. Slip the thread through the holes. Tie off and there you go!

Don't you agree that  the simplest pleasures are the very best ones - simple pleasures like this project. I love that, with a regular piece of paper and a few odd supplies, kids can enjoy hours of creative fun.

Wishing you a Simple Saturday kind of Happy Easter!

Simple Saturday Prep: Bunny Eyes

 Hey there, Simple Saturday bunnies!

(Oops, I meant to say buddies. Hop you can forgive me. Oh, I mean hope you can forgive me. Sheesh...seems that I've got a bad case of Easter tongue.)

Let's make this post jack-rabbit quick, shall we? Tomorrow bring some scissors, make some markers, and perhaps a bit of string and we'll make the cutest pair of Simple Saturday Bunny Eyes you've ever seen!

There will be a .pdf download available tomorrow, as well. One that can easily be accessed from your computer. Print scads of copies, if you'd like. One for everybunny in your nest. Err...everybody.

Well, hoppy day to you! Ugh...I mean happy day!

Simple Saturday: The Bubble Gum Game

All right, here we go! Gather the gang and let's play the Simple Saturday Bubble Gum Game!

Ask the kids to sit in a circle, placing their feet and hands flat on the floor in front of them.

Now, you, being the wise one in charge, must repeat the following rhythmic chant while sequentially tapping the toe or hand of each child in the circle, moving clock-wise each at every hash-marked spot in the Simple Saturday Bubble Gum Game mantra.

The mantra goes as follows: Bubble/Gum/Bubble/Gum/in/a/dish./ How/many/pieces/do/you/wish?

 Make sure your kids have both their hands and feet placed flat on the floor while playing this game...unlike this cool picture I snagged from the internet. When you say 'wish', let your hand linger upon the hand or foot of an unsuspecting child and ask, "How many pieces of bubble gum would you like?" The child then states a number - say 5. You then proceed, in a clock-wise manner, sequentially counting out the next 5 hands or feet in the circle. One-two-three-four-FIVE! The not-so-lucky hand or foot numbered 5 is now 'out', and must be removed from the circle of play.

 The game mantra is sequentially repeated. Again, when you say 'wish', linger upon the hand or foot. Have the child state how many pieces of fantasy bubble gum they'd like to have. Play out that number to eliminate another appendage. The winner (or loser) of the game is one who has the last foot or hand remaining.

Simple Saturday Prep: Bubble Gum Game

 Parents and teachers, have you ever been in situations such as these? Say, you have there are two or more kids of the bubbly-bouncing quasi-strong-willed sort. And you, being the adult in the scene, have to decide which one goes first in any given situation - be it who will become the the leader in the line, or who is to be the first one to hit the bathtub...you get the picture.

My dear grown-up friends, trust me...the Simple Saturday Bubble Gum Game serves as a fun, palatable way to convince your darling children to perform some less-than-appealing duty or to fairly choose who may be first to engage in an over-the-top-exciting task. And, despite it's gummy name, the game is Sugar Free!

 So, tomorrow, gather up the kiddies in your life  - those that need your guidance figuring out who earns the high honor of leading the pack.We will need both their hands and their feet to play this game together.

Not dismembered, mind you. That just wouldn't be right.

Simple Saturday: The Ultimate Dog Toy

 Just look into those amber eyes, will you? He LOVES this toy!

Here's all you do to make it. Of course you've purchased the most inexpensive 9 inch wide piece of fleece fabric you could find, right? (If you paid more than $3.00, shame on you. Keep it as cheap as you can. That's half the Simple Saturday fun.)

So, all you do is lay it out flat, cut it into three or four long strips, and knot it in random places. Big knots. Little knots. Tie the strips together here and there and everywhere. And then...presto! You've made a Simple Saturday Ultimate Dog Toy!

Tripod hasn't quit playing with it since I gave it to him. He flips it in the air. Gnaws on it. Paws at it.

I'm ready for him to saw some logs on it.

Good night, Tripod.

Simple Saturday Prep: The Ultimate Dog Toy

 This week I am going to show you how to make the simplest dog toy in the world, one that will give your pup hours and hours of pleasure. Paula, Tripod's trainer at Dog Boys made one for him as a reward after he passed a grueling (or rather a fooling) obedience test. He loves this thing, I tell you. And your dog will, too.

The only supplies you need to make the Simple Saturday Ultimate Dog Toy is a piece of fleece fabric about foot wide and some scissors. That is IT!

 Okay...while we're on the subject of dogs - in particular my dog - let me take a moment to tell you about the fun Tripod and I had last weekend. He and I strutted  a little over 3 miles in the Mighty Texas Dog Walk, a fundraiser for the Texas Hearing and Service Dogs. He did such a good job. Good Tripod. He deserves a Simple Saturday Ultimate Dog Toy, don't you think?

Simple Saturday: A Springtime Celebration of Kindness

My front yard phlox and verbenia...ripe for the picking. All right, Simple Saturday pal. We have to get our sly super-sneaks on. That's the name of the Simple Saturday covert game of the Springtime Celebration of Kindness. We have to work like a sleuth and fast, fast, fast!

Got the goods? The paper cup, ribbon, and some flowers (That we have asked permission to pick, I might add. If not, your parents might freak out if they discover a divert in their dahlias. Flowering weeds work wonderfully for this project - truly they do.).

Super...now here's the backstory regarding this post. As a kid I moved all over the USA. While small measures of my vagabond-like childhood had downsides, most of it was amazing! Like, when I moved to Nebraska (I think it was Nebraska), and springtime arrived, all the kids engaged in the coolest game, which we're going to call the Simple Saturday Springtime Celebration of Kindness.

 The rules of the game were/are as follows.

  • Kids create a May basket like Dixie cup container by poking two holes in the lip of the cup. The piece of ribbon or string was/is strung and secured though the holes creating a handle-like extension of the basket/cup.
  • A small handful of flowers were/are arranged, Simple Saturday style, in the cup.
  • Once the basket/cup arrangement has been created, a team of kids decide upon which favorite neighbor they'd like to bestow their flowery gift upon. Then, the clan of kids would embark upon said chosen beloved neighbor's home, hang the basket/cup bouquet on said neighbor's front door knob, ring the bell, and then run like the devil!
  • Should the gift-givers become discovered, the delivery didn't count. If the recipient guessed who did it, the game was still on. They/you had/have to go back and do it all again with another neighbor in mind.

 The aspect that I love most about this game was/is the secretive nature of doing a good deed for another. The point to the game was to avoid getting found out. I love that! What a even more wonderful world this would be if we weren't so worried about getting credit for the kind deeds we do, ya think?

Heck, together let's spread Springtime kindness...in a sly, covert, Simple Saturday kind of way. Wanna? Let's go!

Simple Saturday Prep: A Springtime Celebration of Kindness

In Texas? Nah...This picture amazes me. Behold those bold and beautiful crocus blossoms fighting their way through that chilly snow. Ye-gads! Now that's what I call tenacity! Those flowers ain't April Fooling around, I tell you.

I found this photo on one of my most favorite blogs, Seven Impossible Things Before Breakfast. You should check it out. It's really good! I read it when I need a good poetic shot in the arm.

So, this morning I'm walking Tripod, admiring the neighborhood's newly planted flowers, and this week's Simple Saturday activity popped into my head! Ready for some super-sneaky fun?

 Tomorrow we're going to reenact one of my most favorite childhood memories - one that celebrates the onset of springtime, friendship, and your marvelous sense of adventure. All we need is a small paper cup, a piece of ribbon, and some tiny flowers.

 All for now. Now go out and enjoy this lovely spring weather...here in Texas, anyway!

Simple Saturday: Beach Blanket ABC's

 Got your sunscreen with ya? Sandals and snorkel? Your sleuth-like sense of snooping adventure?  Then you, my friend, are ready to play the Simple Saturday Beach Blanket ABC's with me and about 70 SCBWI friends from all around the world. Come on! This is going to be fun!!!!

This game can be played one of two ways - with letters or with the initial sounds of objects. Either way, Beach Blanket ABC's is a marvelous way to reinforce the sequential patterning of the alphabet.

All you do is convince your band of travelers to gawk out of the car window and, jointly, search for a particular letter together. Letters can be found on billboards, buildings, neon signs, and license plates.

While basking on a beach in the Bahamas, I convinced a wacky band of RA's to play Beach Blanket ABC's with me and we had a blast! Want to see what we came up with? It's great!

Kristin started us off by modeling the letter A on the front of her shirt. Jo also found an apple. (What would an alphabet game be like if the sacred apple wasn't represented, right?)

I found a double whammy for the letter B - a boy with a bucket!

Coconuts, anyone? The large or small variety? The letter C was also represented by a fanch schmancy camera. (I wouldn't know where to begin to use that thing! I'll stick with my CoolPics.)

 D is for driftwood or a Rasta Man's dreadlocks.

E is for Mary's elbow.

F is for a flapping First Aide flag. (Catch the alliteration? Heh. Heh.)


I found two for the price of one for the letters G and H. Check out George chilling out on a hammock!

I is for ice.

K is for the SCBWI kite.

L is for lounge chairs.

M is for mask.

N is for Chris' Australian nose. 

O is for the olives in my salad.  

P is for parasail or pirate. That's right, I said pirate.

Q is for the quarter that just happened to be laying on my chair.

R is for raft.

S is for sunglasses. (Thanks, V is for Vicki.)

T is for towel.

U is for umbrella.

V is for Vicki sporting the sunnies.

W is for waves.

X is for X marks the sandy spot!

Y is for yoga.

Z is for a cool zebra-striped shell.

Now you know your sandy ABC's.

Thanks for hanging at the beach with me.

And huge thanks to all my SCBWI buddies for the help and all the fun!

Simple Saturday Prep: Beach Blanket ABC's

Ever taken a trip with kids who are bored out of their minds? Squabbling?  Asking how much farther? He's breathing on me! She's looking at me. No! No! No!

Let me teach you a game that just might save your vacationing sanity. The Simple Saturday Beach Blanket ABC game is free, fun, and the stuff that can make memories out of molehills.

To play this game all you need is a pair of sharp eyes, a destination and you're off! Tomorrow's game playing destination will be on a private beach in the Bahamas. That's right, we're taking a long, drawn out, boring trip to the Bahamas to play our game together. Tough duty, but someone has to do it, right?

Until tomorrow, bon voyage, dear friends!


Simple Saturday: The Number Roll

 If you know of any wee person who is having trouble with numeric place value or likes an on-going challenge, here you go! This activity is one that can be revisited whenever a free moment arises.

All you need is a paper clip, pencil, scissors, tape, and some 1/2 inch square graph paper. I brought some graph paper along to share with you. Click right HERE to download a few sheets. You know where there's more when you need some.

Place Value StripsTo begin, we're going to cut out place value strips. Cut a strip one grid wide, several two grids wide, and a few three grids wide.

Now grab your pencil and the one grid sheet and we're off! Start at the top and write a zero. (The big deal about understanding place value is know where to put that dad-burned zero. For real...once a kiddo is confident with that ghostly number it's clear sailing from there on out!)

All right...write the numbers 1 through 9 in sequence, one numberal in each square grid. Yipes! The number 10 has two numerals, doesn't it? A 1 and the phantom zero. What do we do?

No sweat. Just tape a two grid strip to under the number 9, making sure that the additional grid space extends to the left.

Like I said, it's all about where you put the zero. Write the number 10 in the grid spaces below your 9 by placing the 1 in the grid to the left and the 0 directly below the 9. Now we're off to the races!

Keep writing numbers sequentially in this fashion until you reach 99. Then, guess what, you're going to begin using the three grid strips. Like before, tape the three-skee with the addition grid extending to the left. Write the number 100 by placing the 1 in the new grid space and and, now, two zeros in the grid spaces to the right.

 From here on out really watch where those zeros are placed, those pesky devils. When you reach 999 you have graduated to four space place value grid sheets! Good for you! 

The longest number roll I've ever seen stopped at the number 5,725. I'll bet yours will beat that one.

Simple Saturday Prep: The Number Roll

 Roll 'em, roll 'em, roll 'em. Keep those pencils movin', Rawhide!

Got your attention, podnah? Hope so.

Tell me true. You having some trouble hog-tieing those single, double, and triple digit numbers?  Is trying keep those critters corraled in the correct place value spot more than you can handle? No more cause to fret, my friend. Tomorrow's post will settle all your worries.

Join me tomorrow as we make the ever-so-simple, yet-oh-so-wonderful Simple Saturday Number Roll. All you need to bring with you is some tape, scissors, a pencil, a big paper clip, and the .pdf I'll have ready for you to download.

Until tomorrow, here's a challenge for you. Access this link to the Rawhide song by clicking HERE.

Listen to it a couple of times and try to get the dad-burned thing out of your head the rest of the day.

It can't be done.

Simple Saturday: A Mouthful of Lightning

 Talk about packing a peppermint punch! Get ready to see this everyday, common treat put some sparkle in your life...err... mouth!

All right now, pal, I have to tell you that this amazing phenomenon happens pretty darned fast. You'll have to keep those peepers open wide or you'll miss the whole light show.

Here's how it goes. Unwrap the peppermint before entering the darkened room. With your mirror nearby, either on the wall or in your hand, go ahead and close the door. Now...wedge that candy on between your upper and lower back molars, spread your lips wide in the biggest open mouth grin you can muster, and bite down on the candy.

Oh! Did you see that?

That spark?

You didn't? Well, not to worry. Just rinse out your mouth with warm water and do it again.

Remember, watch closely because it happens lightning fast!


Simple Saturday Prep: A Mouthful of Lightning

You heard me right. Tomorrow we're going to make lightning pop in our mouths.

Don't worry, Mama. No electricity is required. Just a mirror, a really-really-really dark room, a peppermint candy, and your mouth.

Okay...some of you might find the following suggestion a little on the gross side, but (now that I have your full attention) I found that a ripe and raw morning mouth works the best. It seems that the fullest sense of oral earthiness proves to be the perfect condition for Simple Saturday Mouth Lightning. 

If at all possible skip brushing your teeth tonight. Do what you have to. Beg, borrow, or bribe Mom into giving you one night off...just one? (You know how to play that whine just right to get what you want, don't you? I know.  It's a practiced skill. Use it to your advantage.)

See you tomorrow morning with your bad-breathed self. We'll have some fun then.


Simple Saturday: Colorful Water Bottle Fun

Check out these vivid primary colors. Are they terrific?

You have scrounged up the three water bottles, water, and food coloring, right? Lucky for me, I've got plenty of bright Texas-football-weather like sunshine to play with. How about you? What's your tempie like?

Okay...go ahead and drop 6 or so fat drops of color into the water. If you're careful, you can watch the color slowly ribbon down through the water. After a while, go ahead and mix the water and color up by shaking the bottle a few times.

Now here comes the easy part. We're going to blend primary colors to create secondary colors by simply placing one bottle near one another and allowing sunlight to to do heavy lifting.

For example, the luscious green illuminating from the bottle to the right was created by placing the yellow bottle next to the blue one. Pretty cool, eh?

Don't believe me? Let's try it again with the yellow and red bottles. What becomes of this, you ask? Longhorn orange...that's what.

How can we make those Aggies happy? Easy...put the red bottle next to the blue one and gig 'em.

Simple Saturday Prep: Colorful Water Bottle Fun

 I'm hanging my head in shame. Tomorrow's post is going to rate as the simplest of Simple Saturday post of all time. I'm not kidding you.

And yet tomorrow's activity possesses a magical quality powerful enough to keep a youngster mesmerized for a long period of time. For real.

All that to say, gather up three water bottles, some food coloring, water, and, hopefully, a sunny day. That's all we need. Hard to believe, isn't it?

Actually, any clear bottles will do. I'm not picky.

Let's just keep our fingers crossed for a sunny day, shall we?

Until tomorrow...